In the previous post, I showed all the references to get the Chromium for Android source code, setup Eclipse and build the ChromeShell app. Today I’m going to explain how to debug that app running in the device.
Debugging from command line
This is the first step that we must ensure to have working before trying to debug directly from Eclipse. The steps are explained in the debugging-on-android howto, but I’m showing them here for reference.
Perform the “build Chrome shell” steps but using debug parameters:
 ninja -C out/Debug chrome_shell_apk
 build/android/adb_install_apk.py --apk ChromeShell.apk --debug
To avoid the need of having a rooted Android device, setup ChromeShell as the app to be debugged going to Android Settings, Debugging in your device. Now, to launch a gdb debugging session from a console:
 cd ~/ANDROID/src
 . build/android/envsetup.sh
 ./build/android/adb_gdb_chrome_shell --start
You will see that the adb_gdb script called by adb_gdb_chrome_shell pulls some libraries from your device to /tmp. If everything goes fine, gdb shouldn’t have any problem finding all the symbols of the source code. If not, please check your setup again before trying to debug in Eclipse.
Debugging from Eclipse
Ok, this is going to be hacky. Hold on your hat!
Eclipse can’t use adb_gdb_chrome_shell and adb_gdb “as is”, because they don’t allow gdb command line parameters. We must create some wrappers in $HOME/ANDROID, our working dir. This means “/home/enrique/ANDROID/” for me. The wrappers are:
Wrapper 1: adb_gdb
This is a copy of ~/ANDROID/src/build/android/adb_gdb with some modifications. It calculates the same as the original, but doesn’t launch gdb. Instead, it creates two symbolic links in ~/ANDROID:
- gdb is a link to the arm-linux-androideabi-gdb command used internally.
- gdb.init is a link to the temporary gdb config file created internally.
These two files will make the life simpler for Eclipse. After that, the script prints the actual gdb command that it would have executed (but has not), and reads a line waiting for ENTER. After the user presses ENTER, it just kills everything. Here are the modifications that you have to do to the original adb_gdb you’ve copied. Note that my $HOME (~) is “/home/enrique”:
 # In the begining:
 CHROMIUM_SRC=/home/enrique/ANDROID/src
 ...
 # At the end:
 log "Launching gdb client: $GDB $GDB_ARGS -x $COMMANDS"

 rm /home/enrique/ANDROID/gdb
 ln -s "$GDB" /home/enrique/ANDROID/gdb
 rm /home/enrique/ANDROID/gdb.init
 ln -s "$COMMANDS" /home/enrique/ANDROID/gdb.init
 echo
 echo "---------------------------"
 echo "$GDB $GDB_ARGS -x $COMMANDS"
 read

 exit 0
 $GDB $GDB_ARGS -x $COMMANDS &&
 rm -f "$GDBSERVER_PIDFILE"
Wrapper 2: adb_gdb_chrome_shell
It’s a copy of ~/ANDROID/src/build/android/adb_gdb_chrome_shell with a simple modification in PROGDIR:
PROGDIR=/home/enrique/ANDROID
Wrapper 3: gdbwrapper.sh
Loads envsetup, returns the gdb version for Eclipse if asked, and invokes adb_gdb_chrome_shell. This is the script to be run in the console before starting the debug session in Eclipse. It will invoke the other scripts and wait for ENTER.
 #!/bin/bash
 cd /home/enrique/ANDROID/src
 . build/android/envsetup.sh
 if [ "X$1" = "X--version" ]
 then
  exec /home/enrique/ANDROID/src/third_party/android_tools/ndk/toolchains/arm-linux-androideabi-4.8/prebuilt/linux-x86_64/bin/arm-linux-androideabi-gdb --version
  exit 0
 fi
 exec ../adb_gdb_chrome_shell --start --debug
 #exec ./build/android/adb_gdb_chrome_shell --start --debug
Setting up Eclipse to connect to the wrapper
Now, the Eclipse part. From the “Run, Debug configurations” screen, create a new “C/C++ Application” configuration with these features:
- Name: ChromiumAndroid 1 (name it as you wish)
- Main:
- C/C++ Application: /home/enrique/ANDROID/src/out/Debug/chrome_shell_apk/libs/armeabi-v7a/libchromeshell.so
- IMPORTANT: From time to time, libchromeshell.so gets corrupted and is truncated to zero size. You must regenerate it by doing:
rm -rf /home/enrique/ANDROID/src/out/Debug/chrome_shell_apk
ninja -C out/Debug chrome_shell_apk
- Project: ChromiumAndroid (the name of your project)
- Build config: Use active
- Uncheck “Select config using C/C++ Application”
- Disable auto build
- Connect process IO to a terminal
- IMPORTANT: Change “Using GDB (DSF) Create Process Launcher” and use “Legacy Create Process Launcher” instead. This will enable “gdb/mi” and allow us to set the timeouts to connect to gdb.
- Arguments: No changes
- Environment: No changes
- Debugger:
- Debugger: gdb/mi
- Uncheck “Stop on startup at”
- Main:
- GDB debugger: /home/enrique/ANDROID/gdb (IMPORTANT!)
- GDB command file: /home/enrique/ANDROID/gdb.init (IMPORANT!)
- GDB command set: Standard (Linux)
- Protocol: mi2
- Uncheck: “Verbose console”
- Check: “Use full file path to set breakpoints”
- Shared libs:
- Check: Load shared lib symbols automatically
- Source: Use the default values without modification (absolute file path, program relative file path, ChromiumAndroid (your project name)).
- Refresh: Uncheck “Refresh resources upon completion”
- Common: No changes.
When you have everything: apply (to save), close and reopen.
Running a debug session
Now, run gdbwrapper.sh in an independent console. When it pauses and starts waiting for ENTER, change to Eclipse, press the Debug button and wait for Eclipse to attach to the debugger. The execution will briefly pause in an ioctl() call and then continue.
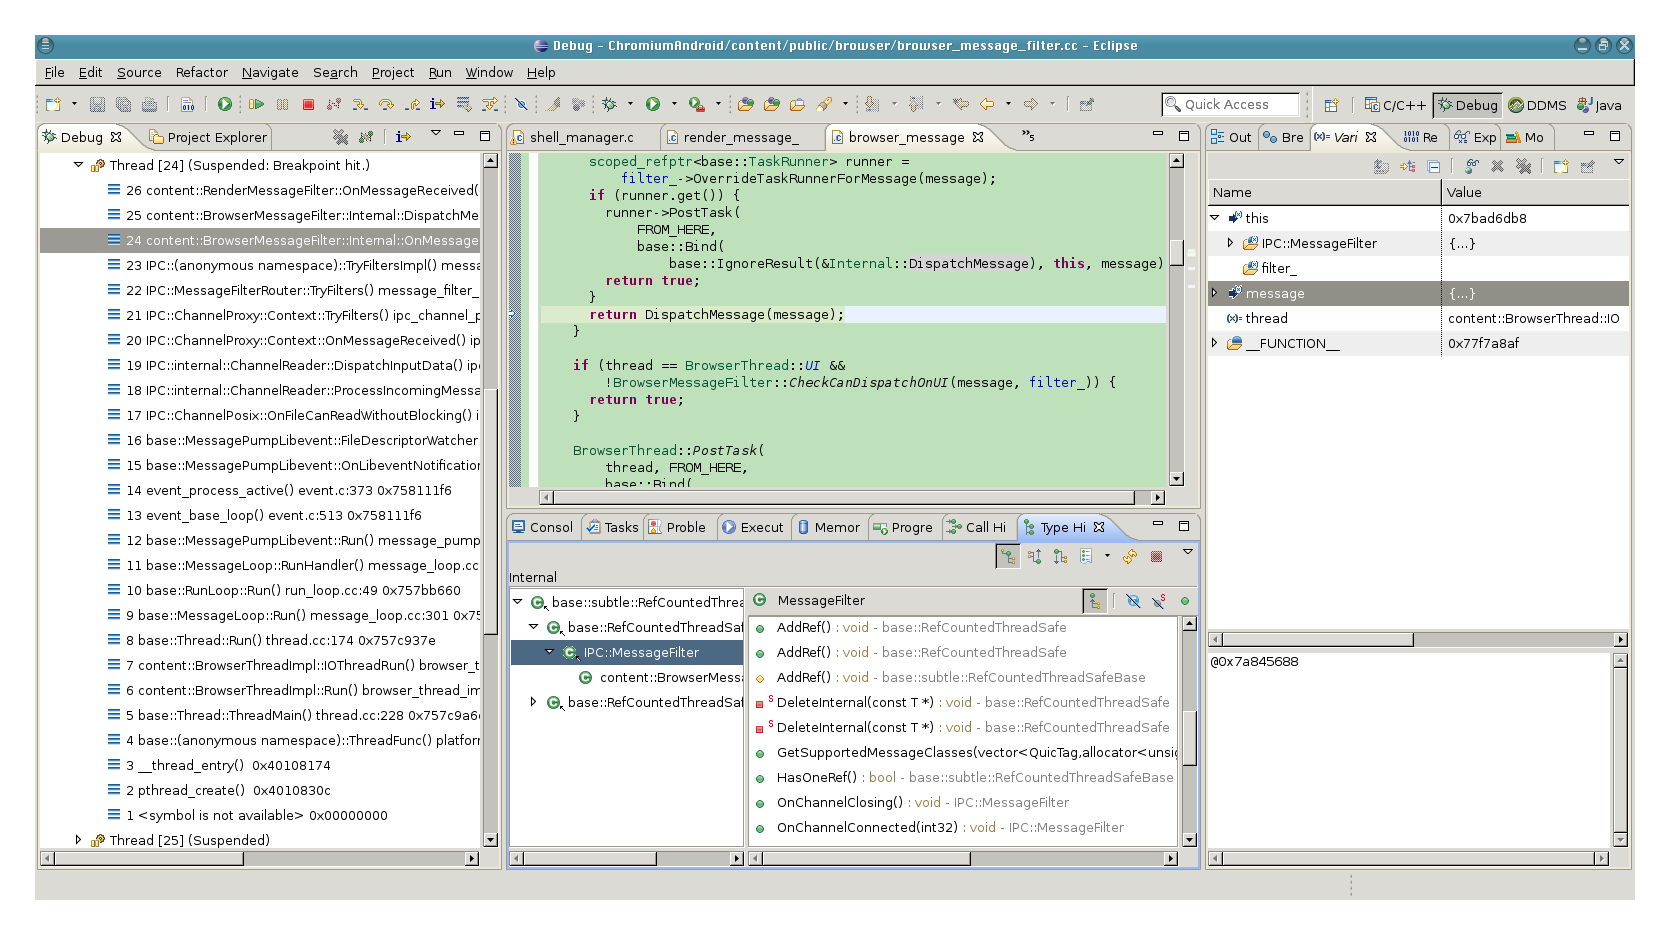
To test that the debugging session is really working, set a breakpoint in content/browser/renderer_host/render_message_filter.cc, at content::RenderMessageFilter::OnMessageReceived and continue the execution. It should break there. Now, from the Debug perspective, you should be able to see the stacktrace and access to the local variables.
Welcome to the wonderful world of Android native code debugging from Eclipse! It’s a bit slow, though.
This completes the C++ side of this series of posts. In the next post, I will explain how to open the Java code of ChromeShellActivity, so that you will be able to hack on it like you would in a normal Android app project.
I could not got the debugger attached until I increased the debug timer in eclipse at Window -> Preferences -> C/C++ -> Debug -> GDB/MI